Start wiring up your breadboard and ready to have some fun? Well, since FORTH is such a different language, a better preparation is always recommended...
An Interactive FORTH Tutorial
If your programming language exposure has been with C, Java, or even Python so far, FORTH is quite different. Quote Nick: "It's no functional or object oriented, it doesn't have type-checking, and it basically has zero syntax". No syntax? So, anyway, before you dive right into the deep-end, here's a good online materials.
- Interactive tutorial for FORTH primer. It teaches you how FORTH fundamentally works such as the numbers, the stack, and the dictionary.
You can skip to next section and start getting your hands dirty right away. However, if you prefer gathering all the sticks before starting a fire or enjoy immersing yourself in the philosophical wonderland of FORTH, excellent online e-books are here free for you. - Timeless classic for the history, paths, and thoughts behind FORTH language.
Install nanoFORTH - to be simple and useful
- From Arduino IDE's Library Manager
> Make sure you've hooked up one of Arduino Nano/Uno, or a development board that hosts ATmega328> from Arduino IDE > Tools > Manage Libraries, enter FORTH in search box
> find nanoFORTH in the short list, select the latest version, and click the Install button
> from Files > Examples, find nanoForth in Examples from Custom Libraries at very buttom section
> load one of the nanoForth examples, such as 0_blink
> open Serial Monitor, set baud rate to 115200, and line ending to 'Both NL & CR'
> hit compile and upload. You should see the 'ok' prompt, and the built-in LED should be blinking
> in Serial Monitor input bar atop, type WRD and hit <return>. See what nanoFORTH says.
- or, from GitHub directly, if you prefer managing source codes manually
> git clone https://github.com/chochain/nanoFORTH onto your local Sketch directory> copy examples/0_blink/0_blink.ino from sub-directory, then rename it as nanoFORTH.ino
> open nanoFORTH.ino with Arduino IDE, and setup your Nano/Uno (or ATmega328) development board
> in nanoFORTH.ino, change the #include <nanoFORTH.h> to #include "./src/nanoFORTH.h"
> open Serial Monitor, set baud rate to 115200, and line ending to 'Both NL & CR'
> compile and upload, you should see the 'ok' prompt, and the built-in LED is blinking
> in Serial Monitor input bar atop, type WRD and hit <return>. See what nanoFORTH says.
- Hopefully, thing goes well and you get something like this if nanoFORTH is uploaded successfully
screen shot 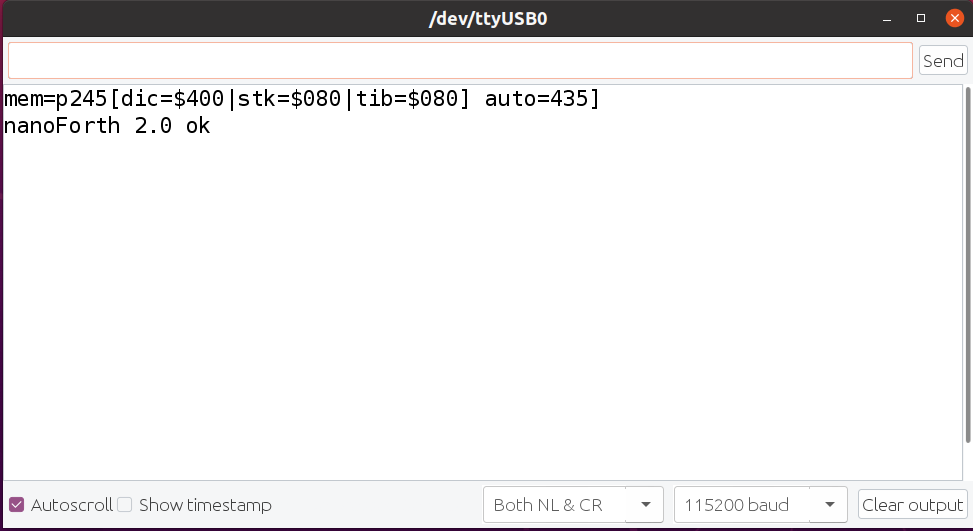
Exercise
We have gone through a lot of 'paper work', time for some hands-on again. If needed, or you've skipped through somehow, please do review the previous page HERE (the Why page) for some instructions we've gone through earlier.
Now let's try some fancy stuffs to see what nanoFORTH has to offer.
- Turn the tracing flag on, and try everything we did in the previous page.
1 TRC ⏎
lit ?z - If it's too much info for you, then turn the tracing off.
0 TRC ⏎
- To do some logic ops in hex, and back in decimal, we can do this.
HEX ⏎
40 38 ⏎
⇨ 40_38_ok OR ⏎
⇨ 78_ok DEC ⏎
⇨ 120_ok - Get Arduino clock/millis, a double precision (i.e. 32-bit) value.
CLK ⏎
⇨ 17786_9_ok> nanoFORTH uses two 16-bit cells on data stack to represent the 32-bit number
> note the numbers above are for example only, your clock read will be different - To benchmark something, let's define a function zz that runs in empty loops and time it.
: zz 10000 FOR NXT ;⏎
CLK DNG zz CLK D+ ⏎
⇨ 103_0_ok> Our ten-thousand cycles are completed in 103ms, i.e. ~10us/cycle, not too shabby!
> DNG negate the first clock ticks
> D+ add two clock counts (i.e. (-t0) + t1) to deduce the time difference - To find out how many bytes of memory has been used.
HRE ⏎
⇨ 76_ok - To dump the memory to see how all these words are encoded in the dictionary.
0 HRE DMP ⏎
> There! You can see the hex dump of our red ... blu ...
> in their gory detail all the way up to the latest word zz - At the end of the day, or to prevent a power outage hit, we can save what's been done so far into EEPROM.
SAV ⏎
- When needed, we can zap the sandbox i.e. reset the nanoFORTH system pointers for a fresh start.
BYE ⏎
⇨ nanoFORTH v2.0 ok> The data stack, return stack, and instruction pointers will be reinitialized
- After restart your Arduino, words can be restored from EEPROM where you saved earlier.
Alright! That has pretty much concluded our rounds of exercise. You probably have wondered that if the SAV/LD pair can provide the ability to withstand power failures, can it be rebooted in the field for our future apps on Nanos? Well, yes! To do that, we have another word for you - SEX - it is! Short for Save and Execute. It saves the dictionary into EEPROM and set the autorun flag. When your Arduino reboots, the flag in EEPROM is checked. If it is indeed set, the last word saved will be executed.LD ⏎
0 HRE DMP ⏎ - Here's one example for a turnkey start up.
: fun ( - - ) 1000 DLY ." I'm alive! blink " 20 xy ; ⏎
SEX ⏎
BYE ⏎
⇨ nanoFORTH v2.0 reset
⇨ I'm alive! blink 20 19 18 17 16 15 14 13 12 11 10 9 8 7 6 5 4 3 2 1 ok
> When you entered BYE this time, nanoFORTH reboot and runs the last word you've saved. In our case, it is fun, the blinker.
> Note that the ( - - ) is a Forth-style comment that you can use. A \ (back slash) can also be used to ignore comments to the end of your input line.
> if you missed how xy worked, you might need to revisit the previous page HERE - To disable the autorun, a normal SAV again will clear the flag. It does keep your dictionary intact in EEPROM, i.e. words you've created before are still in place.
We know microcontrollers in the field are often built to run in an endless loop. But, before you get creative and save the wonderful turnkey application into EEPROM, make sure you know how to get out of a reboot loop. Since it might be your last word, do double check it. Regardless, if you found your Arduino is stuck, all is not lost. It's a bit messy but basically you need to compile/upload another .ino file that can wipe the EEPROM before you can reload nanoFORTH (or it will try loading your code from EEPROM and autoexec again).SAV ⏎
BYE ⏎
⇨ nanoFORTH v2.0 ok
OK, if you feel good so far, we can try some fancy stuffs. nanoFORTH uses Arduino 8-bit Timer2 for its internal "ticker". The 16-bit Timer1 is purposely left for other libraries such as Servo, AltSoftSerial. There are 8 slots available for timer interrupt handlers. You can install or replace service routines in each slot independently (and on the fly if you want to). Signal changed from either HIGH to LOW or LOW to HIGH can be track by installing Ping Change Interrupt handler.
- Multi-task with timer interrupt that blinks red LED at 100ms interval.
: tic 5 IN 1 XOR 5 OUT ; ⏎
100 0 TMI tic ⏎
1 TME ⏎
> put our word tic in timer interrupt handler slot 0 and to serve at 100ms interval,
> 1 TME turns on timer interrupt, the red LED should start blinking, and 0 TME will turns it off, of course
- Track pin signal changed with Ping Change Interrupt.
12 PCI tic ⏎
> when pin 12 signal changed, tic will be called.
Note that, limited by design, Arduino ping change interrupt groups pings into only 3 ports (i.e. 0~7, 8~13, A0~A7). So if you have both pin 4 and 5 (in the same group) enabled, only one call to tic if signals changed. To identify which pin changed, you need to read the port themselves to make sure. Read this site for details.
All in all, nanoFORTH is real-time, and can multi-task. It is interactive and extensible. It can be reprogrammed on-the-fly or even over-the-air. Many many exciting stuffs can be added onto this simple system. Hopefully, this is a start of a fun journey far and beyond.
1. Why - Review nanoFORTH command examples
3. What - Learn nanoFORTH internal details